Since changing the rear end from the Pinto 2.73 ratio to the Falcon 3.50 ratio my speedometer has been way off (too fast!) So I ordered a 21 tooth driven gear the other day. It came in the mail yesterday so I pulled the old one out this morning and replaced it.
The process was pretty simple, remove the bolt and retainer that holds the speedometer cable into the tailshaft of the trans and pull, it came right out. The one that was in it was 17 teeth (tan in color) and quite worn. I removed the small retainer clip with a screwdriver and installed the new (red in color) 21 tooth gear. Pushed it back into the housing and reinstalled the bolt that holds the retainer. All in all about 5 minutes (took longer to jack the car up!).
Took it for a test drive and the speedometer still shows about 5 mph faster than I'm going (checked with a local speed trap sign). I figure that's close enough and since I'm going to be changing the rear tires to a taller tire size it should compensate in the correct direction.
Thursday, February 28, 2013
Tuesday, February 26, 2013
last couple days work.
Started installing the dzus fasteners in the rear bed shock cover. Still have more to install but so far they are working (and looking) good.
Painted the inside of the hood flat black.
Removed the old 'car alarm' that didn't work.
Began re-wiring the electric fan but discovered the fan doesn't work. I will pull it out when I'm replacing the harmonic damper next month.
Painted the inside of the hood flat black.
Removed the old 'car alarm' that didn't work.
Began re-wiring the electric fan but discovered the fan doesn't work. I will pull it out when I'm replacing the harmonic damper next month.
Tuesday, February 19, 2013
Bondo work!
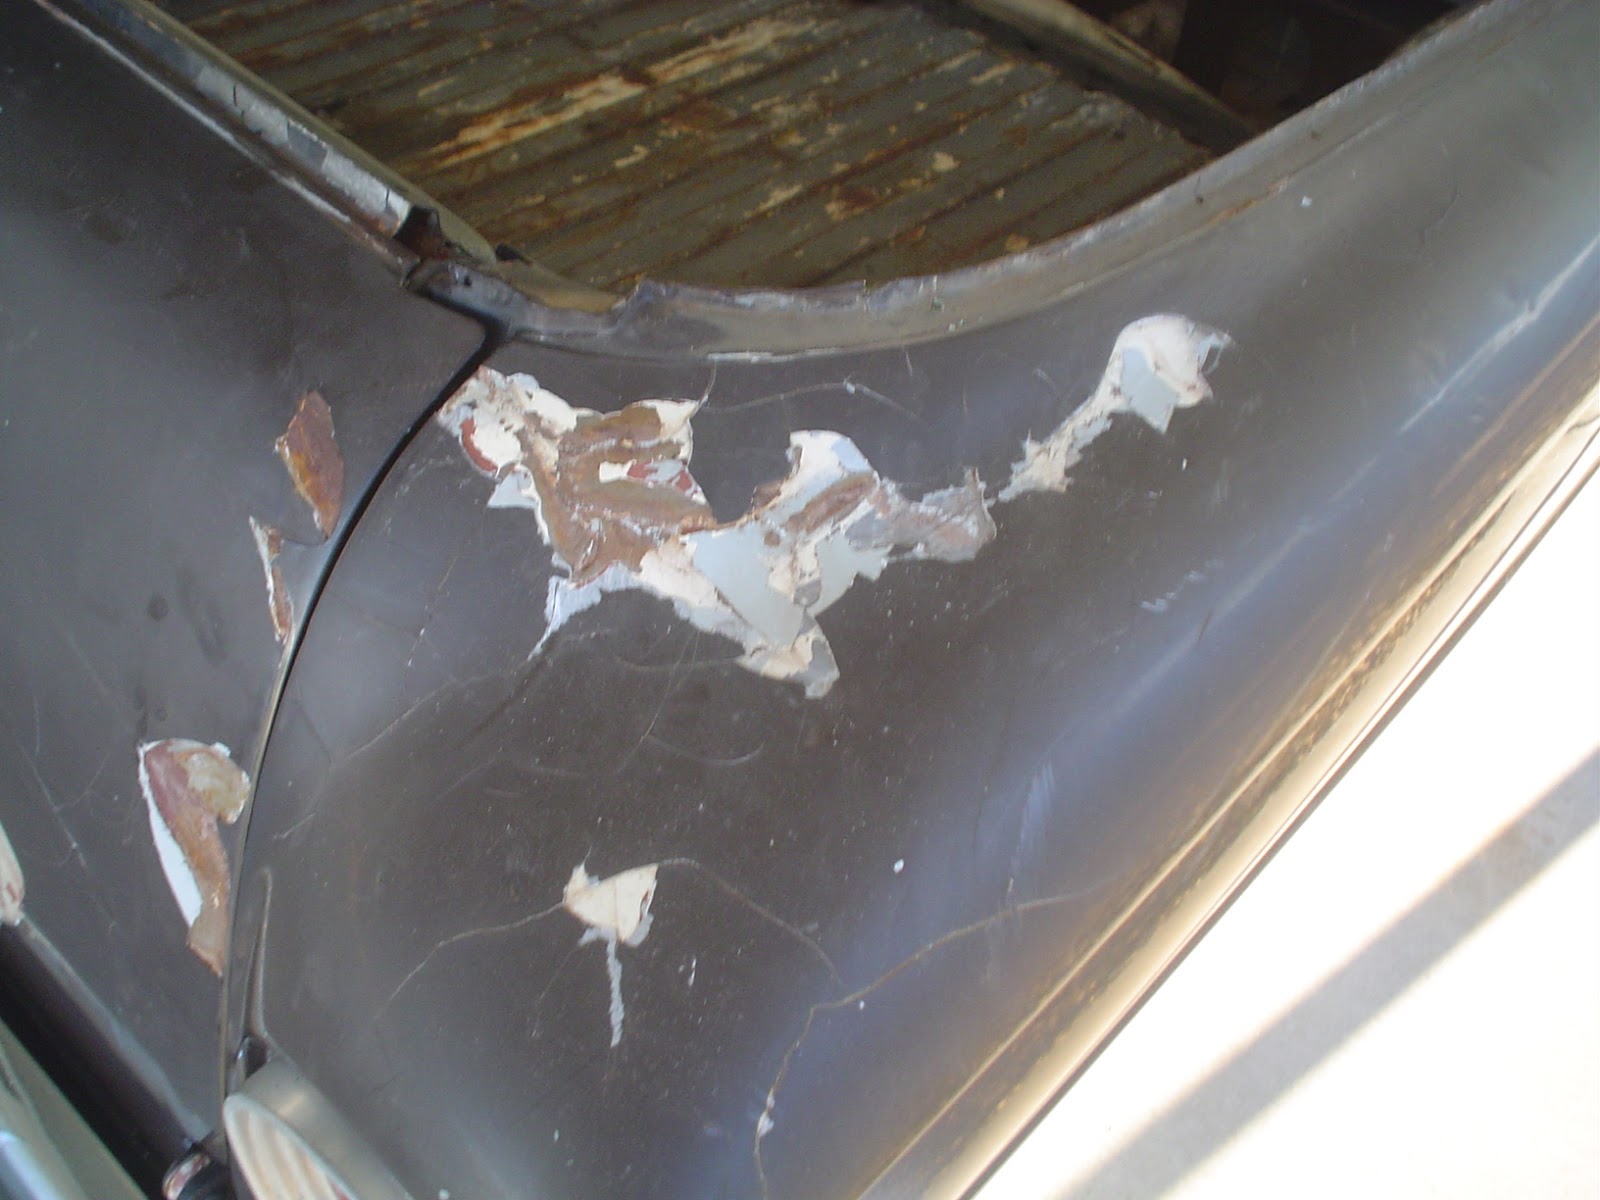
Here's some early photos to give you an idea of the condition of the paint on the car.
It had been painted many years ago by Earl Sheib. They covered the original 'Corintian White' with a thick layer of bondo (to hide the dings and some of the rust!) then painted Coco Brown. I'm sure this was considered a 'high end" Earl Sheib job but over the years the bondo cracked and chipped. Rather than 're-invent' the wheel I am just doing a 'fix and paint to one color' job. I don't have the resources or funds to really get into a complete top end paint job so I'm experimenting. Anyway here's some photos of what I'm starting with.


It had been painted many years ago by Earl Sheib. They covered the original 'Corintian White' with a thick layer of bondo (to hide the dings and some of the rust!) then painted Coco Brown. I'm sure this was considered a 'high end" Earl Sheib job but over the years the bondo cracked and chipped. Rather than 're-invent' the wheel I am just doing a 'fix and paint to one color' job. I don't have the resources or funds to really get into a complete top end paint job so I'm experimenting. Anyway here's some photos of what I'm starting with.


Interior photos
The interior of the car is actually in pretty good shape. Carpet is okay, seat is alright also. The previous owner at one time replaced the stock interior with black tuck and roll. Looks nice but a bit hot in the summer! Steering wheel is an after market 'Grant' wheel. The instrument cluster has been replaced with one from a 63 Mercury Comet. It's much nicer than the stock Ranchero one in my opinion. I've also added a "Sun" tach so I can watch the RPM's. Since the car has a 3.50 gear ratio with a C4 automatic it's not much of a freeway cruiser!


"New" rear end
During the 'test drive' of the Ranchero I was hearing a 'click, click, click' coming from the area of the rear end. I assumed it was u-joints of which I was partially correct. I replaced both u-joints, which were worn badly, however the clicking was still there. Since the click was equal to the rotation of the wheel I figured it had to be the ring or pinion teeth had a chip. I had been told the rear axle was from a 75 Ford Granada however once I had it out I determined it was actually a 77 / 78 Ford Pinto / Bobcat rear end. The biggest issue (other than the fact it was making noise) was the bolt pattern was 4.25" rather than the original 4.5". The previous owner had elongated the holes in the rims to make them fit then used large flat washers to make sure it wouldn't fall off. Not the safest way to do things. I was able to locate a 62 Ford Falcon / 3.50 ratio rear end along with 2 stock rims to replace the modified ones. When I pulled the cover to check the 'new' rear end, I was surprised to find it was in really great shape! I replaced the wheel cylinders, brake line, brake shoes, and brake hardware. I also had to modify the driveshaft as the 'new' rear end had a different size u-joint and the shaft needed to be just a tad longer to fit correctly. Pretty simple job to replace it. Took about 1 hour and it was in. During this I found out the shakel bushings in the springs were shot so I ordered some and will install them later. Here's a picture of the 'new' rear end.


Photos of my rust issues (bed)
Here's some photos of the rust problems I'm dealing with. This area is normally covered by a plate that hides the damage. It's a very typical problem with many Rancheros. The plate actually covers the area that in a station wagon version of the chassis, would be the foot area of the rear seat. Ford had to put the removable cover plate to give access to the upper rear shock bolts. From the factory these are 'sealed' however if the shocks are ever changed the seams will leak. Once it starts you can't see the water sitting in the lower area and the rust starts. My plan is to use a rust stop chemical that will coat the edges then pop rivet a sheet steel patch over the larger areas. This will then be covered with fiberglass. Finally the whole bed (and the area under the cover) will be painted with bed liner. I'm also going to 'seam seal' the patches so hopefully this will slow down the rust so I can get another 20 or so years out of the vehicle.


Where I am with the project
Here's a list of the things purchased so far. It also gives you an idea of the time line and the things replaced:
|
5-21-12 (pep boys) |
Bottle jack |
|
|
Lug wrench |
|
5-25-12 (american tire depot) |
2 front tires (175/70-13) |
|
6-5-12 (autozone) |
Front u-joint |
|
|
Rear u-joint |
|
|
Brown spray |
|
|
Twist in spring spacers (4) |
|
6-7-12 (C&G) |
FORD hood emblems (letters) |
|
|
LH lower door hinge repair kit |
|
6-12-12 (Autozone) |
Chrome paint |
|
|
Gray primer |
|
6-14-12 Lowes |
Brown “Gloss French Roast” |
|
6-15-12 (C&G) |
1/4” Tube Nuts |
|
|
Tailgate Handle |
|
6-20-12 Autozone |
Replacement Antenna |
|
6-23-12 Lowes |
2 cans “French Roast” brn |
|
|
Bondo hardener |
|
|
2” surface prep kit |
|
|
Rust stripper brush |
|
6-28-12 Hanks |
20 screws for door sill |
|
|
Gloss black spray paint |
|
|
Soft Metal buffing kit |
|
7-4-12 Lowes |
Fire Ext. |
|
7-11-12 Pep Boys |
Floor mats |
|
|
Rear speaker box |
|
|
Replacement coverage |
|
7-18-12 Autozone |
1 qt Bondo |
|
|
Plastic spreaders |
|
7-19-12 Hanks |
80 grit sandpaper |
|
|
Asst grit sandpaper |
|
|
3 cans Ace gray primer |
|
7-30-12 Hanks |
Chemical gloves |
|
|
Prep & Primer rust inhibitor |
|
|
10 each trim screws |
|
9-12-12 Hanks |
18x12 26 awg sheet metal |
|
|
Blue mask tape |
|
|
Flt Blk spray |
|
9-15-12 Lowes |
6 cans “french roast” spray paint @ 4.24 each |
|
9-20-12 Used parts from seller in
Canyon Lake |
Rear end, drive shaft, 2 wheels with tires, Tail gate emblem,
air cleaner,
|
|
9-30-12 Autozone (on-line) |
Rear diff gasket |
|
|
Axle flange gaskets 2 |
|
10-3-12 O'Reilly Autoparts |
Brake cable removal tool |
|
|
Rear brake hose/note:
had to rtn and replace with 73 maverick hose |
|
|
Rear brake shoes |
|
|
Drum hardware kit |
|
10-4-12 Autozone |
Rear brake wheel cylinders |
|
10-8-12 O'Reilly Autoparts |
Gear oil
|
|
10-12-12 Autozone |
Carb cleaner |
|
|
Exhaust flange gasket |
|
10-16-12 O'Reilly Autoparts |
Carb rebuild kit |
|
|
Trans rear seal |
|
10-17-12 O'Reilly Autoparts |
Fuel Filter |
|
|
Carb gasket |
|
10-17-12 Autozone |
Air cleaner gasket |
|
11-9-12 Autozone |
Acetone |
|
|
J-B Weld |
|
|
Nitrile gloves |
|
11-12-12 Autozone |
Antifreeze |
|
12-6-12 Ebay |
E-brake assy |
|
12-7-12 4 wheel parts Whsle |
Rear spring bushings both sides |
|
12-12-12 Ebay |
Rear u-joint |
|
12-12-12 Johns Mustang |
U-joint u-bolts |
|
12-19-12 Inland Empire DL service |
Modify drive shaft |
|
1-10-13 Autozone (gift card) |
Sun Super Tach |
|
1-28-13 Hanks |
2 cans flat blk spray paint |
|
|
72” 2x2 alum angle for bed |
|
|
Wire knot brush for grinder |
History of vehicle

I'm going to try to keep this up to date with my work progress on my 63 Ford Ranchero.
First off here's the history of the vehicle I started with:
1963 Ford Ranchero “Deluxe”
Purchase date: 5-19-2012
Previous owner: (the guy across the street)
Eng: 75 ford 250 cu in inline 6 (from
Ford Granada) update 8/16/12 based on the block casting numbers
(D3DE6015DI) it appears the
engine is from a 73 Ford Maverick.
Carb: Carter model YFA
Trans: C4 Automatic 3 spd.
(note: car originally came with a 160
cu in 6 cyl and 3 spd standard trans).
Body: 66B (Ranchero deluxe bench)
Mfg Loc: San Jose, CA
Mfg date: 05M (December 5th
1962)
Original color: “M” (Corinthian
White) Current color: 'Coco Brown'. (Note: Rust-oleum Stops Rust
“French Roast” 12 oz spray cans from Lowes match color pretty
close!)
Instrument panel: based on photos on
the internet it's from a 63 Comet.
Axle: “2” (3.10) NOTE: rear
end has been replaced with something with 4 ¼ center spacing.
stock wheels: 4 on 4 1/2” ctrs 13”
diameter / 5” wide / 3.5” backspace.
Update: Old Rear axle code: WGF AJ 7GB
Bobcat, Pinto 77-78 / 2.73
ratio / 6.57 ring gear dia / 23 spline axle
2 73 67 229A
New rear end info: Code C2DA 4003
62 Ford Falcon / 3.50 ratio
/ 7.25 ring gear dia.
C542 3.50 2A8
rear brakes: 9 x 1.50 brakes
rear brake hose 1970 falcon wagon.
109.5-inch wheelbase and 181-inch
length. The coupes and sedans were 70.5 inches wide and 55 inches
tall with a 6.3-inch ground clearance. The coupes and sedans had a
curbside weight of 2,674 lbs.
Subscribe to:
Comments (Atom)